This tutorial assumes you've worked through the first three, screencap manipulation, single model manip and poster manipulation.
As with all the tutorials, the first thing you need to do is find pictures that can be used for the manipulation.
In this case, you are looking to create a mini-story in the picture from different elements. Pictures will just spark ideas when you see them.
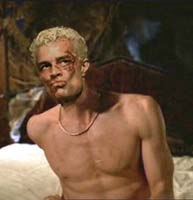
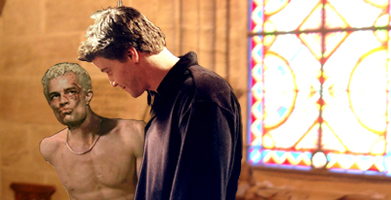
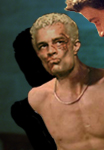
I have this battered Spike's face picture and thought to put it into a picture with Angel. I'll set the scene in a crypt.
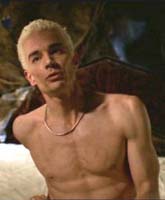
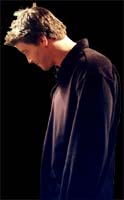
I need to put the head onto a body, so I need one that will match the angle. I had this picture of naked Spike (oh, admit it, you've got lots of them too). I love the defensiveness of the posture. I will look great with that face. I want a picture of Angel's back, as if he's looking at Spike (well, we all know he probably did it!).
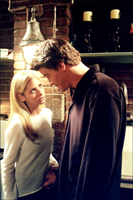
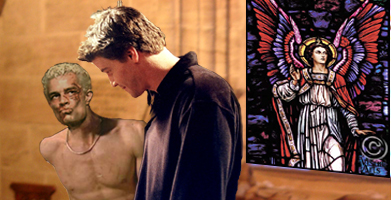
When I saw this picture of Angel, I felt it was perfect. He has a supercillious, disbelieving expression and it gives a slightly new tone to the overall picture. Spike's expression can now come over with a heavy tinge of histrionic fury at being laughed at.
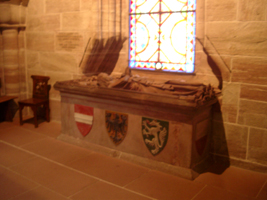
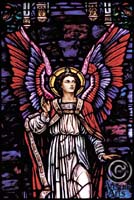
I surfed for some pictures of crypts and liked this one. I want different stained glass, so surfed again and found this one - it's of an Angel, which seemed nicely ironic.
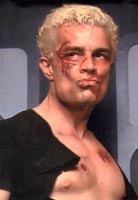
It seems daunting, but work on each part at a time. Select the battered face and put it on Spike's body. I used PS 7 extract, pasted it on, scaled it, and reduced the saturation and then made it a little darker. I blended the neck as usual with a reduce opacity rubber.
The head works really well with the stance of the body.
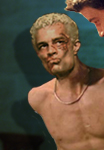
I sharpened the head as well just to make it match better.
Now extract the whole body and head, whichever method you find easiest.
Put them both into the crypt and adjust their positions. (!)
Spike has to look as if he is sitting on the tomb, Angel in front of him. When you are happy you can crop to the bottom of Spike.
I've kept most of the stained glass window in because that's where I want to put the Angel.
Do the usual blurring around the edges of the figures with contract, inverse, blur.
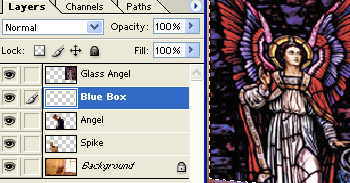
To put the Angel into the window, you copy it, drop it in and then click, edit, transform, skew. Drag the middle right grab handle down until it has the scewed shape to the original, then stretch it to fit with edit, transform, scale.
There are endless things you can do with this glass to get an effect. I made a new layer under the Angel, went back to the Angel layer and Ctrl-clicked it to select it, but then activated the new layer underneath.
Then set your pallet with a blue option, and go edit, fill, forground colour. A blue box beneath the Angel will be created. (basically, I'm putting a blue box the same size and shape of the window behind it).
We'll do that technique again in a minute to create a shadow behind Spike.
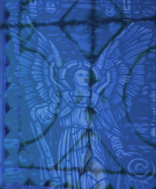
Now play around with colour dodge and colour burn on the angel layer. Take down the opacity. See what effects you like.
I had the blue box on 8% opacity and hard light. The Angel layer I put on 21% and luminosity.
Blur it around the edges as usual.
The frame of the old window shows through and it looks quite spooky and natural.
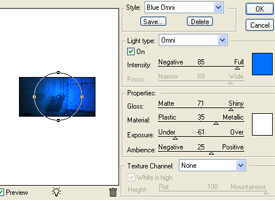
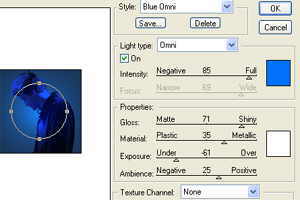
Now you need to do something about the crypt. I like plunging things into moonlight. Put an adjustment layer on and desaturate it. Then go to lighting effects and play for a while. I used these settings:
blue omni, full, shiny 71, metalic 35, underexposed -61 and positive ambience 25.
Now you have to work to blend the figures into the background.
Let's start by giving Spike that shadow. Ctrl-click on his layer and select him (if only it was that easy) then make a new layer underneath him. Leaving the selection, activate the layer below and this time fill it with black.
Deselect then making sure the black shadow layer is active, move it to the left so the light appears to be hitting him from the window on the right.
I've hugely exagerated it here so you can see what I'm doing. Now, take down the opacity to about 30% (although this depends on how bright the light source is supposed to be). Then click filter, blur, gaussian blur. I use shadows a lot in my pictures to make the figures blend in. They aren't noticed, but if you leave them out the pictures look flat and toneless.
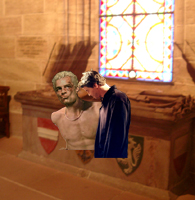
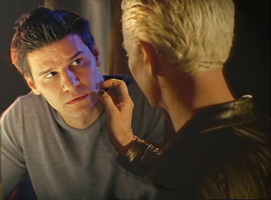
Just as an example of the technique, I've put in this picture, which is now my home page picture (could anything say Love That Dares better?). Notice the shadow from Spike's arm on Angel. Obviously, Spike's arm wasn't there to start with, but by adding the shadow it adds realism to the picture.
Now you need to add light effects to both Angel and Spike. Use the same setting but do each layer separately. I've used blue omni again at those settings.
I've also taken down Spike's layer to 76% opacity to make him look more in the background and therefore our focus is on Angel.
And there you are. You have a whole new picture out of elements that have been added together.
The scope is endless.
Let's hope that Angel Season 5 lives up to expectation with endless slashy situations between Spike and Angel and I can go out of business!
If you want to learn more, I've put up a links page with my favourite tutorials. Most the them deal with text effects, which I don't use much, but the techniques of selecting and lighting and manipulating are pretty universal.
If anyone has found other sites, I'd love to hear from you.
